Newton’s Nook Designs February Release and Giveaway – Day 2

Welcome back for another day of releases from Newton’s Nook! Today’s product release is going to help you get a “hop” on your Easter projects!

All new products for this release will be available for purchase on Friday February 19th!

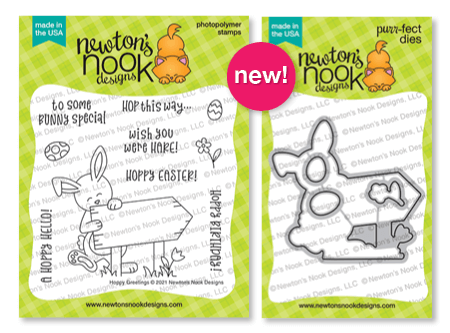
Today’s first card was made using images the new Hoppy Greetings stamp set:

This is one of my favorite ways to create a small scene on a card! I start by creating a stencil using a circle die and masking paper – in this case, I used the die from the Circle Frames Die Set. I then paired it up with the Cloud Stencil to create the sky. Next, I used that same die to cut a circle from green cardstock and then cut that down using the grass die from the Land Borders Die Set. I added a little bit of ink blending at the bottom of the green circle and adhered it over the sky. Now my scene is ready for decoration!

I stamped the bunny image from the Hoppy Greetings set along with a number of eggs and flowers. I colored them using the following Copics:

  • W00, W1, W3, R20, R00 for the bunny
  • E51, E53, E55, E57 for the sign
  • BV02, BV31, BG23, BG11, R20, R00, RV14. RV13, YG17, YG23, YG21 for the eggs, flowers and grass

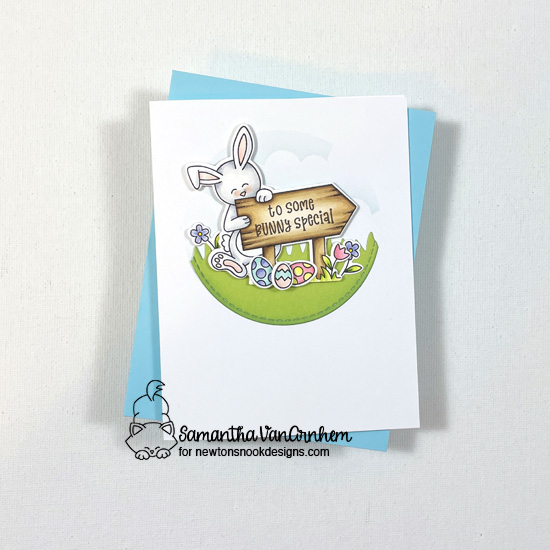
I finished the bunny image by adding a sentiment from the same set and adding to the card front with dimensional adhesive.

Next up is the sweet little Hare Mail stamp:

Small images like this are fun to use multiple times on a card front and the Slimline Frames and Windows Die Set provides the perfect home for three of them!

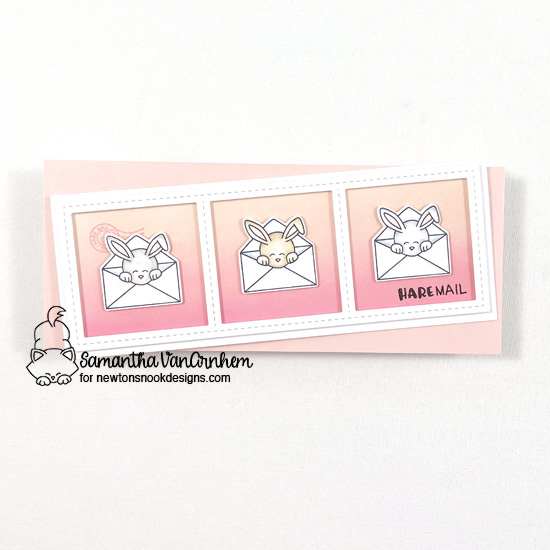
I started by blending the background using Tattered Rose and Worn Lipstick distress ink. I also used the Worn Lipstick ink to add a postmark image under the bunny on the left. If you would like the sentiment to be a bit more subtle, you could have done them same there but I chose black this time.

I then stamped and die cut three of the bunny images. I colored each bunny a different color using Copic markers:

  • W00, W1, W3
  • E55, E53, E51
  • C00, C1, C3 (I also used C00 and C1 to add a bit of shading to each of the envelopes)

Finally, I attached each bunny using foam adhesive and did the same with the slimline frame die cut (if you don’t have skinny strips of foam adhesive, just try cutting a few frames and adhering them together with liquid adhesive to add a little dimension).

One other idea I had for this bunny was to fussy cut just the face from the image and use it to peek out from all kinds of places besides the envelope!

Thanks so much for stopping by!

Would you like to win the “Hoppy Greetings” Stamp Set? This stamp set will be given away to ONE lucky winner!

Here’s how to win: Comment on the NND blog and Design Team blogs (see list below)! Thewinner will be chosen at random from the collective reveal posts. Make sure to check out each of their blogs and comment for your chance to win. You will not know which blog has been chosen so the more you comment on the better your chances are of winning! You have until Thursday February 18th at 9pm EST to comment  — winners will be announced on the blog post on Friday, February 19th. 

Check out all the awesome Design Team Blogs below to enter:

Newton’s Nook Designs

Ellen Haxelmans

Tina Herbeck

Larissa Heskett

Samantha Mann

Zsofia Molnar

Maria Russell

Farhana Sarker

Tatiana Trafimovich

Samantha VanArnhemYou are here!

Amanda Wilcox

Newton’s Nook Designs February Release and Giveaway – Day 1

Hello friends and welcome to Day 1 of the Newton’s Nook February release! Spring is in the air and I’m so excited to share all of the projects I’ve been working on!

All new products for this release will be available for purchase on Friday February 19th!

My first project uses the new Spring Roundabout stamp and Basket Weave stencil:

This image reminded me of a basket full of Easter goodies so I tried to create that look on my card:

I started by blending the background with the Basket Weave Stencil using Vintage Photo Distress Oxide ink. I blended through the stencil first and then after removing it, I blended over the entire panel (focusing a bit more on the edges). You could also just start with a tan or kraft colored cardstock to avoid the extra blending.

Next I stamped the Spring Roundabout stamp onto white cardstock and colored the images using Copic markers in a variety of spring tones. In hindsight, I could have also colored the bunnies dark brown to look like chocolate!

I die cut the image using the largest die from the Circle Frames Die Set. Before attaching it to the card front, I wanted to add something that looked like Easter grass behind it. And you’ll never guess what I used – that’s right, Easter grass! I’m a little embarrassed to admit how long I tried to think of something I could use from my craft room before that forehead slapping moment when I realized I could just get the real thing from my basement! I suggest using a strong, liquid glue to attach everything.

I finished with a sentiment from the same Spring Roundabout stamp set cut out using a banner from the Banner Trio Die Set.

Next up is a project using the other new stencil from this release, Bunny Tails:

Since my brain was already thinking Easter treats, the first thing that came to mind for this stencil was Peeps! All lined up in their little cellophane wrapped boxes. Now if I were being true to that idea, I would have stenciled them all in the same color, but I took a little liberty with a pastel rainbow of Peeps:

Next, I added a little “sugar” tail with clear glitz glitter gel. Once that was dry, I trimmed the panel down to fit on a standard A2 card (the 4×5 bunny grid fits perfectly – yippee!!).

I finished the card front with a sentiment from the Spring Roundabout set. Obvious choice, right?

Thanks so much for stopping by!

Would you like to win the “Spring Roundabout” Stamp Set? This stamp set will be given away to ONE lucky winner!

Here’s how to win: Comment on the NND blog and Design Team blogs (see list below)! The winner will be chosen at random from the collective reveal posts. Make sure to check out each of their blogs and comment for your chance to win. You will not know which blog has been chosen so the more you comment on the better your chances are of winning! You have until Thursday February 18th at 9pm EST to comment  — winners will be announced on the blog post on Friday, February 19th. 

Check out all the awesome Design Team Blogs below to enter:

Newton’s Nook Designs

Ellen Haxelmans

Tina Herbeck

Larissa Heskett

Samantha Mann

Zsofia Molnar

Maria Russell

Farhana Sarker

Tatiana Trafimovich

Samantha VanArnhemYou are here!

Amanda Wilcox